By Mike "Jabs" JaballahFounder and Director. CASA Licensed Drone Pilot.
The best drone photography tips are mostly about what happens before takeoff: learn to fly properly, check you're allowed to fly there, and check the weather. In the air, get low, shoot at golden hour and shoot RAW. Then edit.
In Australia, CASA's rules shape every shot: stay under 120 metres, keep 30 metres from people and never fly over them. If someone's paying you, there are extra steps before you take off.
What should you check before you fly?
Before you fly, check three things: that you can actually fly the drone well, that you're allowed to fly at that spot, and that the weather won't wreck the shot. Good drone photography is mostly decided before takeoff, not while the drone is in the air.
1. Learn to fly your drone. Seriously.
Before you even think about taking photos, learn to fly your drone properly. A DJI Mavic 3 Pro handles differently to a DJI Mini 3, and a DJI Inspire 3 behaves differently again, so take time to practise basic manoeuvres and learn your drone's limits.
Learn how to control altitude and speed, how input on each stick affects the other axes of movement, and get familiar with the flight modes. Adjust your expo tuning so you can pull off smoother, more cinematic movements. I've crashed enough drones in my time, so learn from my mistakes and don't make the same ones. Eventually flying becomes second nature, and then you can focus on the photography.
2. Check you're OK to fly
Don't be a peanut. Check a CASA-verified drone safety app like OK2Fly before you put anything in the air, so there are no nasty surprises. It shows restricted and danger zones, airports, hazards and no-fly zones for your location.
Then know the core rules. In Australia you fly in daylight, keep the drone in visual line of sight, stay under 120 metres, and keep at least 30 metres from anyone not involved in the flight. CASA's headline rules have been steady for years, and they also rule out flying over beaches, events or sports grounds when people are there. Shooting somewhere that needs a council or parks permit is a separate step, and our drone permits guide covers how that works in Melbourne.
3. Check the weather
Check the weather before flying, mate. This is vital. Don't fly in strong wind, heavy rain or extreme conditions. UAV Forecast, Windy and Willy Weather are the tools I use. Check wind speed, rain, cloud cover and how many satellites you can expect to lock on to. If it's too windy, you're fighting camera shake and drift on every shot.
How do you take better drone photos in the air?
Take better drone photos by flying lower than you think, changing your angle, using real composition rules and shooting in soft light. The drone gives you the height. The photo still needs a subject, a frame and good light.
4. Try different angles and composition
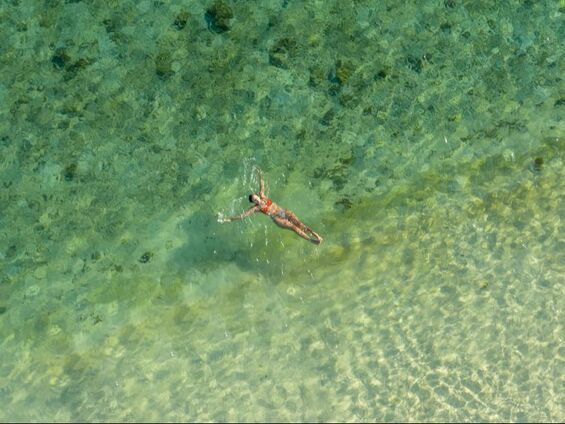
Try different angles and heights. Top-down shots, side angles and low angles all add depth to your portfolio. The low shots usually look best, because they show texture and scale that a high shot flattens out. Angle the camera up so it's pointing above the horizon at your subject. Don't just do the same stuff as everyone else. It's boring.
Composition rules still apply in the air: rule of thirds, framing and leading lines make balanced photos. An out-of-focus object in the foreground can add that extra something. Get a little lower and a little closer to your subject, but do it inside the rules. That 30 metre gap from people is the edge of your frame, not a suggestion.
5. Shoot at golden hour
Golden hour, just after sunrise and just before sunset, gives you soft, warm light that makes drone photos look better. Shadows look especially good from the air, stretching out across the land. They can add drama, or tell the story of your subject's movement. Look for textures in the landscape that low light picks out.
What camera settings should you use for drone photos?
Shoot RAW, keep ISO as low as the light allows, use a shutter speed fast enough to beat wind shake, and bracket your exposures when the sky is much brighter than the ground. Those four settings fix most bad drone photos.
6. Shoot in RAW
If your drone's camera supports it, shoot in RAW. On a DJI drone that means DNG files. RAW files keep far more data than JPEGs, so you can adjust colour, exposure and detail in post without wrecking the image. Shooting RAW plus JPEG gives you a quick preview file as well.
| Setting | Start here | Why |
|---|---|---|
| File format | RAW (DNG), or RAW plus JPEG | Keeps the most data for editing |
| ISO | As low as the light allows | Small drone sensors get noisy fast at higher ISO |
| Shutter speed | Fast enough to freeze any drift | Wind moves the drone, even when it's hovering |
| Exposure bracketing | On for high-contrast scenes | Captures bright sky and dark ground for blending later |
| ND filters | For long exposures in bright light | Slows the shutter for silky water or moving clouds |
How should you edit drone photos?
Edit drone photos by grading the RAW file for colour and exposure first, then fixing the details. Post-production is where a good drone photo becomes yours.
7. Edit your photos
Use editing software to adjust colour, contrast and sharpness, and to correct imperfections. Add your own flair: try a black and white grade, or turn a daylight shot into dusk. We use a combo of Adobe Lightroom Classic and Adobe Photoshop here at Creative Kicks. That's standard practice for us, and RAW files are what make that kind of grade possible.
What drone photography equipment do you need?
Beyond the drone itself, you need spare batteries, spare propellers, fast memory cards, ND filters and a weather app. Batteries run out faster than you expect, and props are the first thing to go when something goes wrong.
- The drone and controller
- Spare batteries, all charged
- Spare propellers
- Fast memory cards, plus a spare
- ND filters
- A landing pad for dusty or grassy sites
- OK2Fly and a weather app on your phone
What changes when you shoot drone photos for a client?
When you shoot drone photos for money, it becomes commercial flying, and CASA's requirements change. Under 2 kg you still need an ARN, operator accreditation and a registered drone. Heavier drones or tighter jobs need a RePL and ReOC.
Under CASA's sub-2 kg excluded category, you can fly a drone of 2 kg or less for business without a RePL or ReOC. But you must get an aviation reference number (ARN), hold RPA operator accreditation, register the drone and fly within the drone safety rules. Jobs outside those standard conditions, like heavier aircraft or flying closer to people, move into RePL and ReOC territory.
The work changes too. On real estate shoots, the agent wants the property and its best features, not a pretty landscape with a roof in it. On construction jobs, consistency matters more than drama: the same position, angle and height every visit, so progress shots line up. On events, the crowd rule means planning your positions before anyone arrives. If you're pricing a job, our breakdown of what drone photography really costs in Melbourne shows where the money goes.
By following these tips, you can lift your game, capture shots that are out of the ordinary and set yourself apart from the rest. And if you'd rather hand the whole thing to a licensed operator, that's exactly what our drone photography service is for.
Questions we get asked
How high can you fly a drone in Australia?
Under CASA's standard rules, no higher than 120 metres (400 feet) above ground level.
How close can you fly a drone to people in Australia?
Keep at least 30 metres from anyone not involved in the flight, and never fly over people or populous areas like busy beaches, parks or events.
Do you need a licence to sell drone photos in Australia?
For a drone of 2 kg or less, you don't need a RePL, but you do need an ARN, operator accreditation and a registered drone, and you must fly within the standard rules. Heavier drones or jobs outside those rules need a RePL and ReOC.
What is the best time of day for drone photography?
Golden hour, just after sunrise and just before sunset. The light is soft and warm, and long shadows add depth and texture you don't get at midday.
Should you shoot drone photos in RAW or JPEG?
RAW, if your drone supports it. RAW files keep much more data for editing colour and exposure. Shoot RAW plus JPEG if you want a quick preview file too.
Want it shot properly?
Tell us the location, what you need captured and when. We'll handle the airspace, permits and flying, and deliver the photos.